

How To Find Vacuum Leaks On An Engine
Dan Ferrell writes well-nigh do-it-yourself motorcar maintenance and repair. He has certifications in automation and control engineering science.
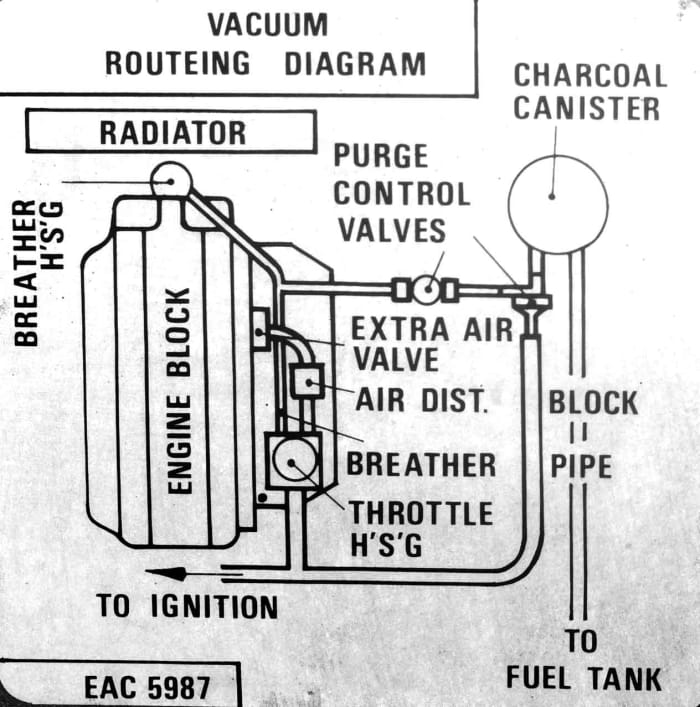
A decal showing a vehicle vacuum hose routing.
Photo courtesy of James A O on Flickr.
A vacuum leak can cause a myriad of drivability problems, as it introduces actress, unwanted air into the engine, leaning out the air/fuel mixture. Modern internal combustion (multi-port fuel injection) engines use intake vacuum to operate sensors, actuators, and ability brakes (on some vehicles). Older engines also apply information technology to operate some emission control devices and to pull fuel into the combustion bedroom.
And so even a small vacuum leak tin can play tricks you, and your motorcar reckoner, into believing a detail sensor or arrangement needs fixing. Then y'all offset replacing components hoping you'll fix the problem, unsuccessfully.
Oft, a vacuum leak makes an audible hissing sound, which makes information technology easy to find; other times, though, you won't hear anything. Car shops use special, plush equipment to detect hard to detect leaks. Just before you head to the shop, you can utilise simple techniques used to track most common vacuum leaks.
This guide non simply helps you find a vacuum leak or an obstructed vacuum hose and gives you useful repair tips, only information technology also tells you what engine performance issues may point to a potential vacuum leak. So let'due south outset at that place.
| Alphabetize |
|---|
| I. When Should I Troubleshoot for a Potential Vacuum Leak? |
| Vacuum Leak Symptoms |
| Vacuum Leak Related Problem Codes |
| 2. How to Notice a Vacuum Leak |
| Using a Vacuum Estimate |
| III. Checking the Intake Manifold for Vacuum Leaks |
| IV. Using a Hand Vacuum Pump to Test Devices for Vacuum Leaks |
| Five. Vacuum Hose Repair Tips |
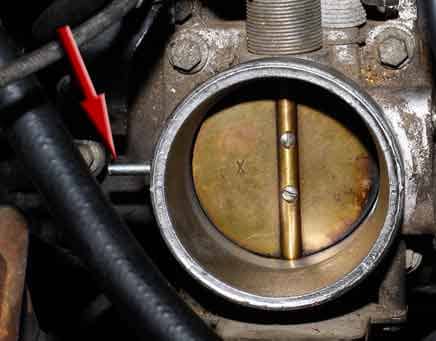
Throttle torso and intake manifld gaskets tin can develop leaks as well.
Photo courtesy of James A O on Flickr.
I. When Should I Troubleshoot for a Potential Vacuum Leak?
Vacuum hoses are a common source of engine performance problems. Subsequently miles of service, vacuum hoses wear out, harden, split or soften; and vacuum tubing deteriorates, turns brittle, and breaks, causing all kinds of engine performance problems.
So whenever you notice an engine functioning problem and can't seem to find the source, include a vacuum leak diagnostic into your repair strategy.
Depending on your particular vehicle make and model, y'all may observe various sensors and actuators that depend on a adept vacuum source to operate. For instance, some engines use a Manifold Absolute Pressure (MAP) sensor that requires vacuum to mensurate outside air pressure.
A MAP sensor vacuum leak tin can upset ignition timing and engine stability and efficiency. A vacuum leak tin also preclude an EGR valve from opening, crusade engine overheating, and increase harmful emissions. This type of leak can as well affect the Positive Crankcase Ventilation (PCV) arrangement.
Vacuum Leak Symptoms
Here is a listing of performance problems to keep in mind, as they might possibly be related to a vacuum leak:
- Backfiring
- Hesitation
- Difficult starting
- Low engine ability
- Misfiring (normally random. You may become trouble code P0300)
- Poor fuel economic system
- Poor acceleration
- Rough idle
- High idle or very low idle, depending on vehicle model.
- Stalling
- Stumbling
- Check Engine Light on
- Oxygen sensor reports a lean mixture continuously.
- Poor brake operation (on vacuum-type power brakes)
Continue in heed that these symptoms are not sectional to a vacuum leak. For case, a bad EGR valve, bad compression, or ignition timing problems may crusade ane or more than of these symptoms as well.
The post-obit diagnostic trouble codes (DTCs) may be triggered by different types of faults, including a vacuum leak.
Scroll to Continue
Read More from AxleAddict
| Trouble Code | Description |
|---|---|
| P0505 | Idle control arrangement malfunction |
| P0301-8 | Cylinder specific misfire |
| P0170 | Fuel trim malfunction (bank 1) |
| P0171 | System besides lean (bank ane) |
| P0173 | Fuel trim malfunction (bank 2) |
| P0174 | System too lean (bank two) |
Check vacuum hose connectors for cracks that may leak vacuum.
Photo courtesy of James A O on Flickr.
2. How to Observe a Vacuum Leak
OK. You lot accept an engine performance problem and you desire to do some vacuum leak checking, where exercise y'all start?
Offset, locate the vacuum diagram for your vehicle. You lot may discover a re-create of the vacuum diagram on your motorcar owner's manual, but most car manufacturers include a diagram inside the engine compartment. Raise the hood and expect around the front of the engine compartment for a decal.
If y'all can't find one on your transmission or in the engine compartment, you lot can buy i at your dealer service department. Some other source is your vehicle repair manual. You can buy an inexpensive aftermarket vehicle repair manual at your local car parts store or online. The repair manual has all kinds of useful data your can use for maintaining and troubleshooting many auto systems. So you'll make a good investment.
The vacuum diagram shows the different vacuum controlled devices and how they interconnect. Newer vehicle models depict the components resemblance and their location.
OK. Now that y'all accept the vacuum diagram for your vehicle, you can beginning troubleshooting for a potential vacuum leak. However, even if you don't take the diagram right now, you lot yet tin follow the next steps.
(Note: If you are trying to discover a potential vacuum leak because of a trouble code you lot retrieved after your Bank check Engine Lite came on, your car computer may exist adjusting the air/fuel ratio to compensate; so the engine might non sound equally if it had a performance trouble. If so, unplug the throttle position sensor [mounted on the throttle body] or oxygen sensor, to force the calculator to run the engine in "hard code" mode [open loop], and then you tin can hear the engine crude idle. This will brand it easier to notice the vacuum leak source during your diagnostic.)
If y'all suspect a particular device (or several), you can kickoff with that device. Otherwise, follow the diagram and first checking each hose. If y'all don't take the diagram, check each vacuum hose as you go around the engine. Most vacuum hoses are thin and soft, except for the one used on the brake booster, which is thicker and more sturdy in design, and maybe the PCV hose.
Troubleshooting vacuum leaks requires a close visual inspection of the hose, making sure it's properly connected, and listening for the telltale hissing audio of the vacuum leak.
But noise from a running engine can make it impossible to hear a hissing sound coming from leaky vacuum hose or gasket. For this yous have ii options: You tin use a mechanic's stethoscope that helps to amplify the sounds in your ear, or you tin employ a length of hose for the same purpose.
How to Check Each Vacuum Hose
Follow the adjacent steps to cheque each vacuum hose, keeping a reasonable altitude from moving components during your inspection:
- Commencement the engine and let information technology idle. Set the manual to Park (automatic) or Neutral (transmission) and utilize the emergency brake.
- Brand sure the hose is properly connected, not loose or hanging free. Information technology'due south piece of cake to knock a hose loose inadvertently when doing maintenance or replacing a component. You may demand to employ a minor mirror and a flashlight to check on difficult-to-reach places, like behind the intake manifold, throttle body, or exhaust manifold.
- Unplug and inspect both ends of the hose. If the inside end of the hose is torn, worn, or widened, cut off the damaged function and plug the hose dorsum to the fitting.
- Trace the length of the hose with your fingers to feel for crude, hardened, splitting, softened, or out-of-shape spots, specially around the hidden, underside of the hose. Also, try to feel for vacuum at those rough or uneven spots.
- Check if the hose is near or touching a hot surface.
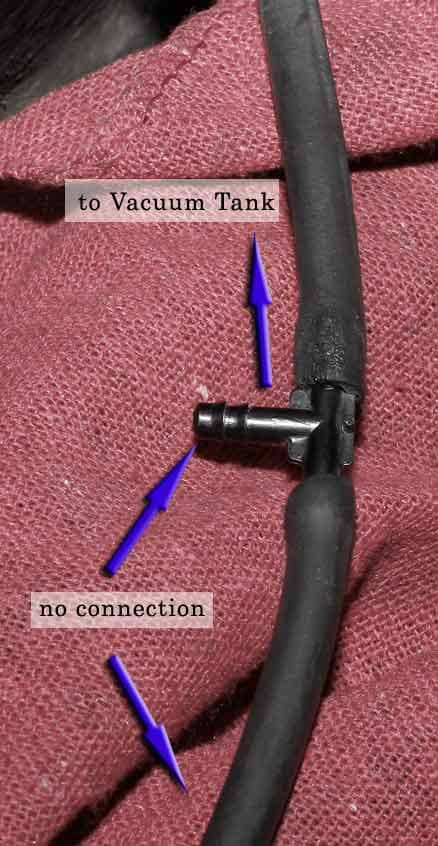
- Also, check hose connectors, tees, and unions for cracks and looseness. Supplant them every bit necessary.
- Pay special attending to the check valve that connects the brake booster to its vacuum hose. If leaking, you may hear a hissing sound.
- You can check a leaking restriction booster at idle by blocking the vacuum hose with a pair of Vice Grip pliers. Use a store rag betwixt the pliers and hose to forestall impairment. If the crude idle improves, check the brake booster and valve.
- Check the hose for contamination too, similar oil, coolant, or some other substance. Disconnect the hose from the device it connects to and bank check within the device connector. If you find a foreign substance inside the hose, contamination has potentially reached within the device as well, probably non performance properly. You lot may need to test the device for proper functioning.
- Equally role of your visual inspection, include the devices the vacuum hoses connect to. Check the devices for harm like cracks, dents, and loose parts. These may create a vacuum leak equally well. Pinch the vacuum line leading to the device, and spray soapy water on it and hear for a change in idle speed.
- If you lot find a hose with a softened, hardened, or damaged spot, supersede it.
You tin likewise spray water on a hose, ports and connectors to help you check for leaks.
Using a Vacuum Guess
You tin also utilize a vacuum gauge to further confirm the presence of a vacuum leak, if necessary. If you don't own a gauge or don't desire to buy ane right now, your local machine parts store may loan you 1.
Follow the instructions that come with the tool and the tips included in the post linked above.
Pay special attention to needle move patterns. A steady low or very low reading may point to a gasket (intake or throttle) leak, among other potential faults.
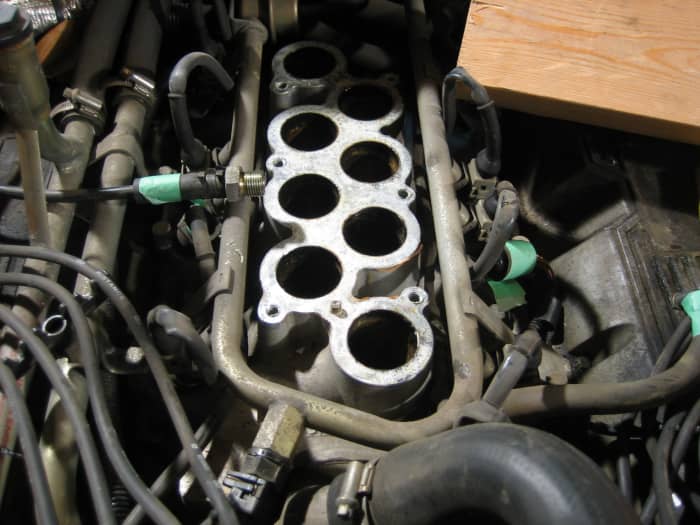
Replace the intake manifold gasket if it develops a vacuum leak.
Photo courtesy of scottt on Flickr.
Iii. Checking the Intake Manifold for Vacuum Leaks
Although you're more probable to encounter a vacuum hose leak, intake manifold gasket leaks too happen. If your previous cheque didn't turn out anything wrong, cheque the intake gasket betwixt the manifold and cylinder caput, and the base gasket located between the intake manifold and throttle trunk or carburetor.
To check these gaskets you can use one of two simple alternative methods:
- Soapy water in a spray bottle.
- A length of hose (or mechanic'southward stethoscope).
Any one of these methods is good.
- Apply the emergency brakes.
- Set your manual to Park (automatic) or Neutral (manual).
- Cake the wheels to be safer and prevent the vehicle from moving.
- Start the engine and permit it idle.
- To employ the soapy h2o, spray a petty effectually the intake manifold where it mates with the cylinder caput and around the base of the carburetor or throttle trunk. Don't forget to visually cheque the intake manifold itself for cracks and spray water on suspect spots.
- Listen for whatever changes in the engine idle.
- If the engine smooths out every bit you lot spray water, you've found the vacuum leak; y'all may also meet bubbles on the location of the vacuum leak.
Annotation: To use a hose (or mechanic'due south stethoscope), identify one end of the hose against your ear and move the other finish of the hose effectually the edge of the intake manifold gasket and carburetor or throttle trunk gasket. If there's a leak, y'all'll hear a hissing sound.
If you plant a vacuum leak either at the intake manifold or at the base of the throttle body, starting time attempt tightening the intake or throttle body mounting bolt:
- Tighten the bolts gradually, following a crisscross pattern—when tightening a manifold, kickoff at the center and piece of work your style out.
- Tighten the bolts to the torque listed in your vehicle repair transmission using a torque wrench.
- Check once more for the vacuum leak.
- If the leak is still nowadays, y'all'll need to replace the intake manifold gasket or throttle torso gasket.
- Follow the instructions in your vehicle repair transmission to replace either gasket.
Watch the video beneath encounter how the guy uses water to diagnose a misfire on cylinder i.
Locating a Vacuum Leak With Water
Four. Using a Manus Vacuum Pump to Test Devices for Vacuum Leaks
Ofttimes, a careful visual and transmission inspection like the one described above is plenty to discover a vacuum leak. Only not all the time.
Some components that operate with vacuum may endure internal impairment (a diaphragm may rupture, for instance). And yous can't diagnose this type of damage by bear upon or sight.
So, if yous doubtable a vacuum leak but tin can find the source, this is the side by side step in your troubleshooting strategy.
For this, you'll need to apply a hand-operated vacuum pump. You may buy i at most auto parts stores or online. The vacuum pump helps in troubleshooting emission systems. Merely if yous don't desire to purchase the tool correct now, your local auto parts store may loan you i.
Follow the instructions that come with the vacuum pump for operation instructions and the repair manual for your detail vehicle for the steps in troubleshooting the device yous demand to test.
Some times you need to troubleshoot a device under specific operating conditions, or in conjunction with another tool. Although this type of troubleshooting may audio complicated, you don't need special training. You do still need to follow the tool operating instructions, all the same, and the repair manual troubleshooting steps.
Likewise, follow these tips when using a vacuum pump:
- Make sure the connection between the pump and the device is tight—utilize the right bore connector or hose to brand the connection.
- Merely employ the correct amount of vacuum for the device y'all are testing (usually ten to 15 in Hg; consult your repair manual).
- The fewer connectors, adapters, and hoses you lot use to connect your hand pump to the device you want to examination, the ameliorate.
You tin utilize a union to repair small vacuum hose leaks.
Photo courtesy of James A O on Flickr.
V. Vacuum Hose Repair Tips
Dealing with damaged vacuum hoses doesn't necessarily mean y'all need to supersede them. Often, a vacuum hose only requires a elementary repair that can take you a couple of minutes or so.
- You can repair a damaged vacuum hose end in a minute. Virtually of the time you lot can get away with cutting off about half an inch at the finish and reconnecting the hose.
- Be careful when dealing with damage located between the ends of a vacuum hose. If you but need to repair a minor hole less than half an inch, cut out the damaged expanse and use a union to reconnect the two pieces back.
- Repair one vacuum hose at a time to avert defoliation. Some vehicles, specially Asian brands, come with several vacuum hoses that can brand it confusing to repair when they interconnect in various ways. For these cases, you tin detect one-, two-, 3-, 4-way, and elbow connectors to deal with almost any kind of hose routing and repair.
- Always characterization hoses and their respective connectors or fittings, and so that you reinstall repaired or new hoses to their corresponding fittings.
- If you detect one or more disconnected hoses, use your vacuum diagram to reconnect the hose to the correct plumbing equipment.
- After making a repair, route and secure the vacuum hose away from hot surfaces and moving components.
- Always replace a vacuum hose with 1 of the same bore and length, and for the awarding intended (PCV, brake booster, or regular vacuum).
This content is accurate and true to the all-time of the author's knowledge and is not meant to substitute for formal and individualized advice from a qualified professional.
Questions & Answers
Question: My check engine light came on, and I went to the mechanic who said it was a P0171 error. Banking concern 1 organisation ii atomic number 82 besides lean. I cleaned the mass air menses sensor and all was fine for around 800 miles and two weeks. Still, it returned with the aforementioned code. I pulled out the MAF sensor to see if it was dingy and it looked fine. What is my side by side step?
Answer: This other mail service may help:
https://axleaddict.com/auto-repair/Trouble-Lawmaking-P0...
Question: When fixing a vacuum leak, how long after resetting the p071 code will it revert if non fixed?
Reply: In general, if you are dealing with an intermittent trouble, information technology may have a while for the light to come back on, until the role fails again and the calculator detects the problem. If in that location's a failed, monitored part, it probably will take a few hours for the computer to observe it again.
Question: How do you set an air leak on a box stock get-kart motor?
Reply: Check the gaskets; the ane between the carburetor and air box might be leaking.
Question: What are the most mutual vacuum leaks on the manifold?
Reply: Check vacuum hoses condition and connectors. Then check for intake gasket leaks. Sometimes spraying some carburetor cleaner on suspected leaks helps to detect damaged hoses and leaks.
Question: If I disconnect a vacuum hose and hear a hissing sound, does that indicate that my vacuum is good? Significant, if at that place is a leak, there wouldn't be a proper seal to keep that force per unit area/vacuum on the line and no hiss would emit when the line is disconnected.
Respond: Information technology is difficult to find a small leak just by disconnecting a vacuum hose. Y'all'd think the hose and plumbing fixtures are perfectly proficient. A vacuum may leak through damaged hoses, gaskets, and faulty valves. If you lot are suspecting a leak, effort using a vacuum approximate. It'll be more accurate. This other post may help:
https://axleaddict.com/auto-repair/Use-a-Vacuum-Ga...
Question: I'chiliad restoring a 50-yr quondam Jeepster 258-vi. I have replaced the intake manifold gasket and put on headers. My jeep starts up but within 3 seconds, the RPM sounds like information technology shoots upward to about 2500 and dies. Could it be the gasket? The jeep will just run for 3 seconds.
Respond: It seems like a huge vacuum leak. It could be the intake manifold or base carburetor gasket. Your local car parts shop may loan yous a smoke machine. Hook it up to the restriction booster hose. Promise this helps.
Question: What could my trouble be? My 2001 Chevy Blazer has constant air audio. Noise is inside the cabin and rises at idle only while intermission is pressed. No fluid loss but with the ignition off, I pump the brakes, they don't become harder, and yet they sink if held while starting, feel spongy and pedal about sink to the floor. Just beginning to learn about diagnosing for a vacuum leak. I volition check the hoses tomorrow. And your assist would be greatly appreciated. Any ideas?
Respond: It sounds similar y'all may accept a vacuum leak in the restriction booster. This other mail may help you diagnose the problem:
https://axleaddict.com/motorcar-repair/Bad-Restriction-Boost...
© 2016 Dan Ferrell

How To Find Vacuum Leaks On An Engine,
Source: https://axleaddict.com/auto-repair/How-to-Find-and-Fix-a-Vacuum-Leak
Posted by: walkerfurk2000.blogspot.com
0 Response to "How To Find Vacuum Leaks On An Engine"
Post a Comment